


Winterizing Your RV: Essential Steps for Canadian Campers
Some Canadians prefer warm weather all year long and flee the country, like geese migrating south, when the cold November winds start to blow. Then, there are the other Canadians who embrace Canada’s four distinct seasons. Although winter RVing might be a bridge too far, these hardier Canadians get out as early in the season as the weather permits and pack it in as late as possible.
One thing is certain: when the leaves turn and there’s a nip in the air, it’s a clear sign for RV owners, that another camping season has come to an end. It also means it’s time to perform an important task: winterizing your RV.
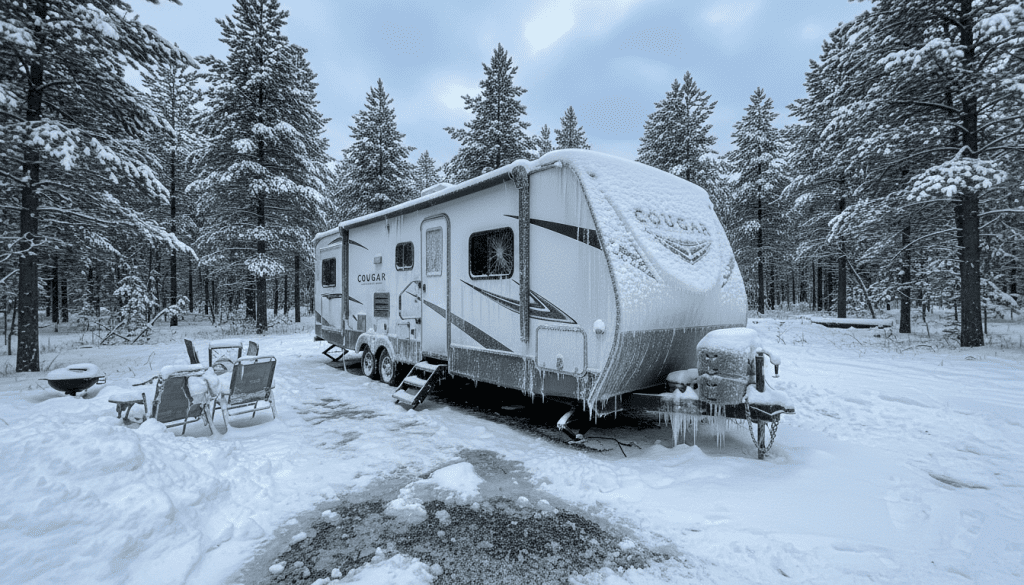
If you call Canada home, skipping this process is not an option. Freezing temperatures can wreak havoc on your RV’s plumbing and exterior, causing serious and expensive damage. Proper winter preparation protects the value of your vehicle, prolongs its life and makes getting it ready to roll next spring so much easier.
It’s a basic law of physics: freezing water expands, causing pipes to burst. Water damage can cause the wood in your vehicle to rot and promote the growth of mold and mildew. In short, water damage can have a catastrophic impact on the value of your vehicle and force you to shell out thousands to get it fixed.
This post guides you through the essential steps to winterize your RV correctly. We cover everything from gathering supplies to protecting the plumbing, interior, and exterior, with tips specifically for Canadian RVers.
Before You Begin: Gathering Supplies and Initial RV Prep
Good preparation makes the winterizing process smoother. Start by getting everything you need together. You also need to do some basic cleaning before storage.
Essential Winterizing Supplies Checklist
Having these items on hand saves time and hassle:
- Non-Toxic RV Antifreeze: You’ll need several jugs (check your RV manual, but 8-12 litres is common). Only use antifreeze labeled “RV & Marine”. It’s usually pink. Never use automotive antifreeze (typically green or orange) in your drinking water system; it’s poisonous. Find RV antifreeze at your local RV Care dealership. You can also conveniently order it online from Shop RV Care.
- Water Heater Bypass Kit: If your RV doesn’t already have one installed, get one. It saves a lot of antifreeze.
- Water Tank Cleaning Wand: Helps flush out the black tank effectively.
- Basic Hand Tools: Wrenches (for water heater plug), screwdrivers.
- Water Pump Converter Kit (or tubing): To pump antifreeze directly from the jug into your system.
- Air Compressor & Blow-Out Plug (Optional): To blow excess water from lines before adding antifreeze. Keep pressure low (40-50 PSI).
- Moisture Absorbers: Products like Dri-Z-Air help prevent mould and mildew inside.
- RV Cover (Optional): A breathable cover protects against UV rays, snow, and ice.
- Battery Tender/Maintainer: Keeps your battery healthy during storage.
- Pest Deterrents: Steel wool, spray foam sealant, peppermint oil, or specific RV-safe repellents.
Finding a Suitable Location and Initial Clean-Out
Where you winterize matters. Choose a spot that’s relatively level. If possible, do the tank draining near a dump station. Many RV Care dealership locations offer dumping services. Check local rules too. Some towns have bylaws about storing RVs on private property over winter.
Before starting the plumbing work, clean your RV. Empty cabinets and remove all personal items. Sweep or vacuum floors. Wipe down surfaces. A clean RV is less likely to attract pests or develop musty odours.
The Heart of Winterization: Protecting Your RV Plumbing System
This is the most important part of winterizing. Water left in pipes or tanks will freeze and break things when Canadian temperatures drop. Follow these steps carefully.
Draining All Water Systems Completely
Get every drop of water out.
- Fresh Water Tank: Find the drain valve underneath your RV (check your manual for location). Open it fully and let the tank empty.
- Grey and Black Water Tanks: Drive to an approved dump station. Empty the black tank first, then the grey tank. Use the black tank flush feature if you have one. Use a tank wand connected to a hose (not your drinking water hose!) to spray inside the black tank via the toilet. Flush until the water runs clear. This prevents nasty surprises in spring. Close the dump valves securely.
- Low Point Drains: Locate the red (hot) and blue (cold) low point drains under your RV. Open both caps or valves. Also, open all faucets inside the RV (sinks, shower) to help air enter and water drain completely. Close faucets once draining stops. Recap the low point drains.
Water Heater Care: Drain and Bypass
You must drain the water heater. Antifreeze should not go into the tank.
- Turn off the water heater. Make sure it’s cool before draining to avoid burns. Turn off the electric element switch (if applicable) and the propane switch.
- Go outside to the water heater access panel.
- Open the pressure relief valve (at the top) carefully to let air in. Water will start draining from the bottom.
- Remove the drain plug or anode rod at the bottom. Use the correct size wrench. Water will gush out. Let it drain fully. (Inspect the anode rod; if it’s heavily corroded, plan to replace it in spring).
- Reinstall the drain plug/anode rod lightly for now, or leave it out and store it safely inside the RV. Some people prefer leaving it out to ensure complete drying.
- Engage the bypass valve(s). Locate the valves on the back of the water heater (usually inside the RV, behind a panel). Depending on your setup (one, two, or three valves), turn them so water bypasses the tank. Check your RV manual if unsure. This step is vital to avoid filling the heater tank with expensive antifreeze.
Clearing Water Lines: Air Pressure vs. Antifreeze
You need to remove water from the pipes themselves. You have two main options, or you can use both for extra protection.
- Option 1: Blowing Out Lines: Connect a blow-out plug adapter to your city water inlet. Use an air compressor set to no more than 40-50 PSI. Too much pressure can damage lines. Go inside and open each faucet (hot and cold, one at a time) until only air sprays out. Don’t forget the toilet flush pedal and the inside/outside shower. This pushes most water out.
- Option 2: Pumping RV Antifreeze: This method pushes water out and replaces it with antifreeze, offering better protection against freezing. See the next section for steps.
Many experienced RVers in Canada recommend doing both: blow out the lines first, then add antifreeze. This ensures minimal water dilution of the antifreeze and provides the best protection in very cold conditions.
Adding Non-Toxic RV Antifreeze
Time to add the pink stuff!
- Set up your pump: Use a water pump converter kit or place the inlet hose of your RV’s water pump directly into a jug of non-toxic RV antifreeze. Ensure the valve from the fresh tank is closed off.
- Turn on the water pump. The pump will draw antifreeze from the jug.
- Go inside: Open the cold side of the nearest faucet (usually the kitchen sink) until you see steady pink antifreeze flowing out. Close it.
- Open the hot side of the same faucet until pink fluid appears. Close it. (This fills the hot water lines up to the bypassed water heater).
- Repeat this process for every faucet: bathroom sink (hot/cold), shower (hot/cold), and outside shower (hot/cold).
- Flush the toilet until pink antifreeze appears in the bowl.
- Don’t forget: If you have a washing machine hookup, ice maker line, or water filter, run antifreeze through those lines too (or follow manufacturer’s specific winterizing instructions). Remove water filters before starting.
- Turn off the water pump.
- Pour about a cup of antifreeze down each sink drain and the shower drain. This fills the P-traps and prevents sewer gases or freezing.
- Pour a small amount of antifreeze into the toilet bowl to keep the seal moist. Add a bit to the black and grey tanks (maybe half a litre each) to protect the drain valves.
Your plumbing system is now protected! You likely used 8-12 litres of antifreeze, depending on your RV’s size.
Prepping the RV Interior for Winter Hibernation
Protecting the inside from pests, mould, and damage is also key.
- Thorough Cleaning and Removing All Consumables:
- Empty everything: Remove ALL food, drinks, spices, toiletries, medications, paper towels, cleaners – anything edible, freezable, or attractive to pests. Critters have a great sense of smell.
- Clean the fridge and freezer: Remove all contents. Wash interior surfaces with baking soda and water or a mild cleaner. Wipe dry.
- Prop fridge/freezer doors open: Use a towel or latch to prevent them from closing fully. This allows air circulation and stops mould/mildew growth.
- Clean cupboards, drawers, floors, and upholstery.
- Protecting Appliances and Electronics:
- Ensure the stove/oven pilot lights are off.
- Turn off the main propane valve at the tanks.
- Consider removing TVs or other sensitive electronics if storing in unheated, very cold conditions.
- Battery Care for Longevity:
- Batteries slowly lose charge over time (parasitic drain). A dead battery can freeze and be ruined.
- Disconnect the negative battery cable(s). This stops most power drain.
- Best Practice: Remove the batteries fully. Clean the terminals. Store them in a cool, dry place (garage, basement – not on bare concrete if it’s an older lead-acid type, though less critical for AGM/lithium). Connect them to a battery tender or smart charger to maintain their charge throughout the winter. A healthy battery survives cold much better.
- Moisture and Odour Control:
- Canada can be damp, even in winter. Trapped moisture leads to mould and musty smells.
- Place commercial moisture absorbers (like Dri-Z-Air or similar calcium chloride products) inside the RV. Use one in the main living area and one in the bathroom or bedroom. Check them occasionally; empty collected water as needed.
- If storing indoors or under a breathable cover, you can crack open roof vents slightly for ventilation. If storing outdoors uncovered, ensure all vents and windows are tightly closed to keep snow and rain out.
- Use odour absorbers (like baking soda boxes or activated charcoal) if needed.
Securing the RV Exterior Against Canadian Elements
Your RV’s shell needs protection too. Snow, ice, sun, and pests can take a toll.
- Tires, Jacks, and Leveling:
- Inflate tires to the maximum cold pressure listed on the sidewall. Cold temperatures lower tire pressure.
- Use tire covers to protect them from UV radiation, which degrades rubber over time.
- Consider parking the RV on leveling blocks to take some weight off the tires, reducing flat spots. This also helps with drainage off the roof.
- Ensure stabilizer jacks are down just enough to steady the unit, not lift it significantly off the suspension.
- Inspecting Seals, Seams, and Roof:
- Walk around your RV. Look closely at window seals, door seals, roof edges, vents, and any exterior seams. Check for cracks, gaps, or peeling sealant.
- Use RV-specific sealant (like Dicor Lap Sealant for roofs or ProFlex for vertical surfaces) to touch up any questionable areas before winter arrives. Water intrusion is a major enemy.
- Clean the roof if needed. Remove leaves and debris.
- To Cover or Not to Cover?
- Pros: An RV cover protects the finish from UV rays, dirt, bird droppings, snow, and ice buildup.
- Cons: Cheaper covers might trap moisture, leading to mould. Wind can cause covers to flap and chafe the RV’s finish if not secured very tightly.
- Recommendation: If you use a cover, choose a high-quality, breathable one designed for RVs and Canadian weather. Ensure it fits snugly and is well-secured to prevent wind damage. Check it periodically.
- Pest Prevention Strategies:
- Mice and insects love sheltered RVs in winter.
- Inspect the underside: Look for any gaps or holes where pests could enter (around pipes, wiring). Seal small gaps with steel wool (mice don’t like chewing it) or spray foam sealant.
- Place pest deterrents around the RV. Options include peppermint oil-soaked cotton balls, commercially available rodent repellents (read labels carefully), or electronic deterrents. Avoid using poison bait inside the RV – pests might die inside, causing a terrible odour.
Canadian Considerations & Resources
Winterizing in Canada has a few specific points.
- Adapting to Regional Climate Differences:
- Winters vary across Canada. Coastal British Columbia is milder than the Prairies or Northern Ontario. While the basic steps are the same, if you live in an area with extreme cold (regularly below -20°C or colder), be extra thorough. Using both air pressure and antifreeze for plumbing is highly recommended. Ensure batteries are fully charged and protected. Check provincial resources like Travel Alberta or Destination BC for regional travel info which might include seasonal weather patterns.
- Winters vary across Canada. Coastal British Columbia is milder than the Prairies or Northern Ontario. While the basic steps are the same, if you live in an area with extreme cold (regularly below -20°C or colder), be extra thorough. Using both air pressure and antifreeze for plumbing is highly recommended. Ensure batteries are fully charged and protected. Check provincial resources like Travel Alberta or Destination BC for regional travel info which might include seasonal weather patterns.
- Provincial Park Winter Access and Storage:
- Most Canadian provincial and national park campgrounds close for the winter season. Check the Parks Canada website or your specific provincial parks agency site (e.g., Ontario Parks, Sépaq) for exact operating dates. Don’t assume you can dump tanks or access services late in the fall. RV storage within parks is generally not permitted.
- Most Canadian provincial and national park campgrounds close for the winter season. Check the Parks Canada website or your specific provincial parks agency site (e.g., Ontario Parks, Sépaq) for exact operating dates. Don’t assume you can dump tanks or access services late in the fall. RV storage within parks is generally not permitted.
- Leveraging Canadian RV Networks and Tools:
- The RV Care network includes dealerships across Canada. They offer professional winterization services, parts (like antifreeze and anode rods), and expert advice. Finding a trusted local dealer is easy through their online locator.
- RVC Navigator is a helpful website listing hundreds of new and used RV’s from trusted dealerships across Canada,.
- For parts and accessories, check out Shop RV Care, the online store associated with the RV Care network.
- The RVDA of Canada (Recreational Vehicle Dealers Association) is another resource for industry information.
- Checking Insurance and Storage Regulations:
- Review your RV insurance policy. Some policies might have specific requirements for off-season storage. [Link to related post: Choosing RV Insurance]
- Double-check your local municipal or community bylaws regarding long-term RV storage on your property. Restrictions sometimes apply during winter months.
Frequently Asked Questions (FAQ) about Winterizing Your RV in Canada
Here are answers to common questions:
- Q1: When is the best time to winterize my RV in Canada?
- A: Before the first hard freeze hits your area. Monitor local weather forecasts closely. This usually means late September through mid-October, depending on your location from coast to coast. Don’t wait until the last minute.
- A: Before the first hard freeze hits your area. Monitor local weather forecasts closely. This usually means late September through mid-October, depending on your location from coast to coast. Don’t wait until the last minute.
- Q2: Do I really need RV-specific antifreeze? Can I use automotive antifreeze?
- A: ABSOLUTELY NOT use automotive antifreeze. It is toxic. You MUST use non-toxic RV & Marine antifreeze (usually pink) designed for potable water systems.
- A: ABSOLUTELY NOT use automotive antifreeze. It is toxic. You MUST use non-toxic RV & Marine antifreeze (usually pink) designed for potable water systems.
- Q3: How much RV antifreeze do I need?
- A: It varies by RV size and layout, but 2-3 gallons (about 8-12 litres) is typical. It’s wise to buy an extra jug just in case.
- A: It varies by RV size and layout, but 2-3 gallons (about 8-12 litres) is typical. It’s wise to buy an extra jug just in case.
- Q4: Can I just drain the lines and not use antifreeze?
- A: This is very risky in Canada’s climate. It’s almost impossible to drain every drop of water. Any water left in low spots, valves, or the pump can freeze and cause cracks. Blowing out lines helps, but adding antifreeze is the safest bet for complete protection.
- A: This is very risky in Canada’s climate. It’s almost impossible to drain every drop of water. Any water left in low spots, valves, or the pump can freeze and cause cracks. Blowing out lines helps, but adding antifreeze is the safest bet for complete protection.
- Q5: What happens if I miss a step or do it wrong?
- A: You risk frozen and burst water lines, cracked pipe fittings, a damaged water pump, broken toilet valve, or even a ruined water heater tank. Springtime repairs can be costly and delay your first trip.
- A: You risk frozen and burst water lines, cracked pipe fittings, a damaged water pump, broken toilet valve, or even a ruined water heater tank. Springtime repairs can be costly and delay your first trip.
- Q6: Where can I get my RV professionally winterized in Canada?
- A: Most RV dealerships offer winterization services. The nationwide RV Care network is an excellent resource for finding qualified technicians you can trust near you.
- A: Most RV dealerships offer winterization services. The nationwide RV Care network is an excellent resource for finding qualified technicians you can trust near you.
- Q7: Do I need to winterize if I’m heading south (USA) for the winter?
- A: Yes, likely. You might encounter freezing temperatures on your journey south, especially traveling through northern states or mountain passes. It’s best to winterize before you leave unless you are certain you will stay well below the freezing line throughout your entire trip. You also need protection if your departure is delayed into cold weather.
Conclusion: Rest Easy Knowing Your RV is Protected This Winter
Winterizing your RV is quite literally preparing your vehicle for hibernation. It’s a vital chore every Canadian RV owner needs to perform and perform properly. It might seem like a lot of steps, but it is well worth the effort, ensuring that your vehicle retains its value and delivers RVing pleasure season after season.
Think of the peace of mind you’ll have during those cold winter nights. Come spring, instead of facing costly repairs, you’ll be ready to de-winterize quickly and hit the road for new adventures. Consider making a checklist specific to your RV model to ensure you don’t miss anything year after year.
Don’t let winter catch you unprepared! Follow these steps for worry-free storage. If you’re unsure about any step or simply prefer professional service, contact a certified technician. Find your nearest RV Care dealership for expert winterization and advice.
